
Studio Portrait Shoot Experience
By Ashok Karan
As a photojournalist, my life and lens have always been drawn to the outdoors—capturing moments of student unrest, political turbulence, cultural festivals, sports, and incidents that unfolded in real time. Studio photography was never really a part of my professional journey. Most of my portraits were shot in natural light, under the open sky, relying solely on the sun as my main source of illumination.
Back then, I had little opportunity to work with artificial lighting. I’d learned that the best natural portraits are taken when the sun is low—early morning or late afternoon—creating a soft, flattering light. But when I eventually opened my own studio, I knew I had to adapt. Studio work is a different ball game, requiring a more controlled environment and a deeper understanding of artificial lighting setups—typically involving three lights:
- Main light – the primary source of illumination
- Fill light – to soften shadows
- Backlight – to add depth and separate the subject from the background
Despite years of outdoor photography, I embraced this change. The old habits took time to adjust, but they didn’t hold me back. I began shooting portraits, modeling assignments, and even product and food photography in my studio.
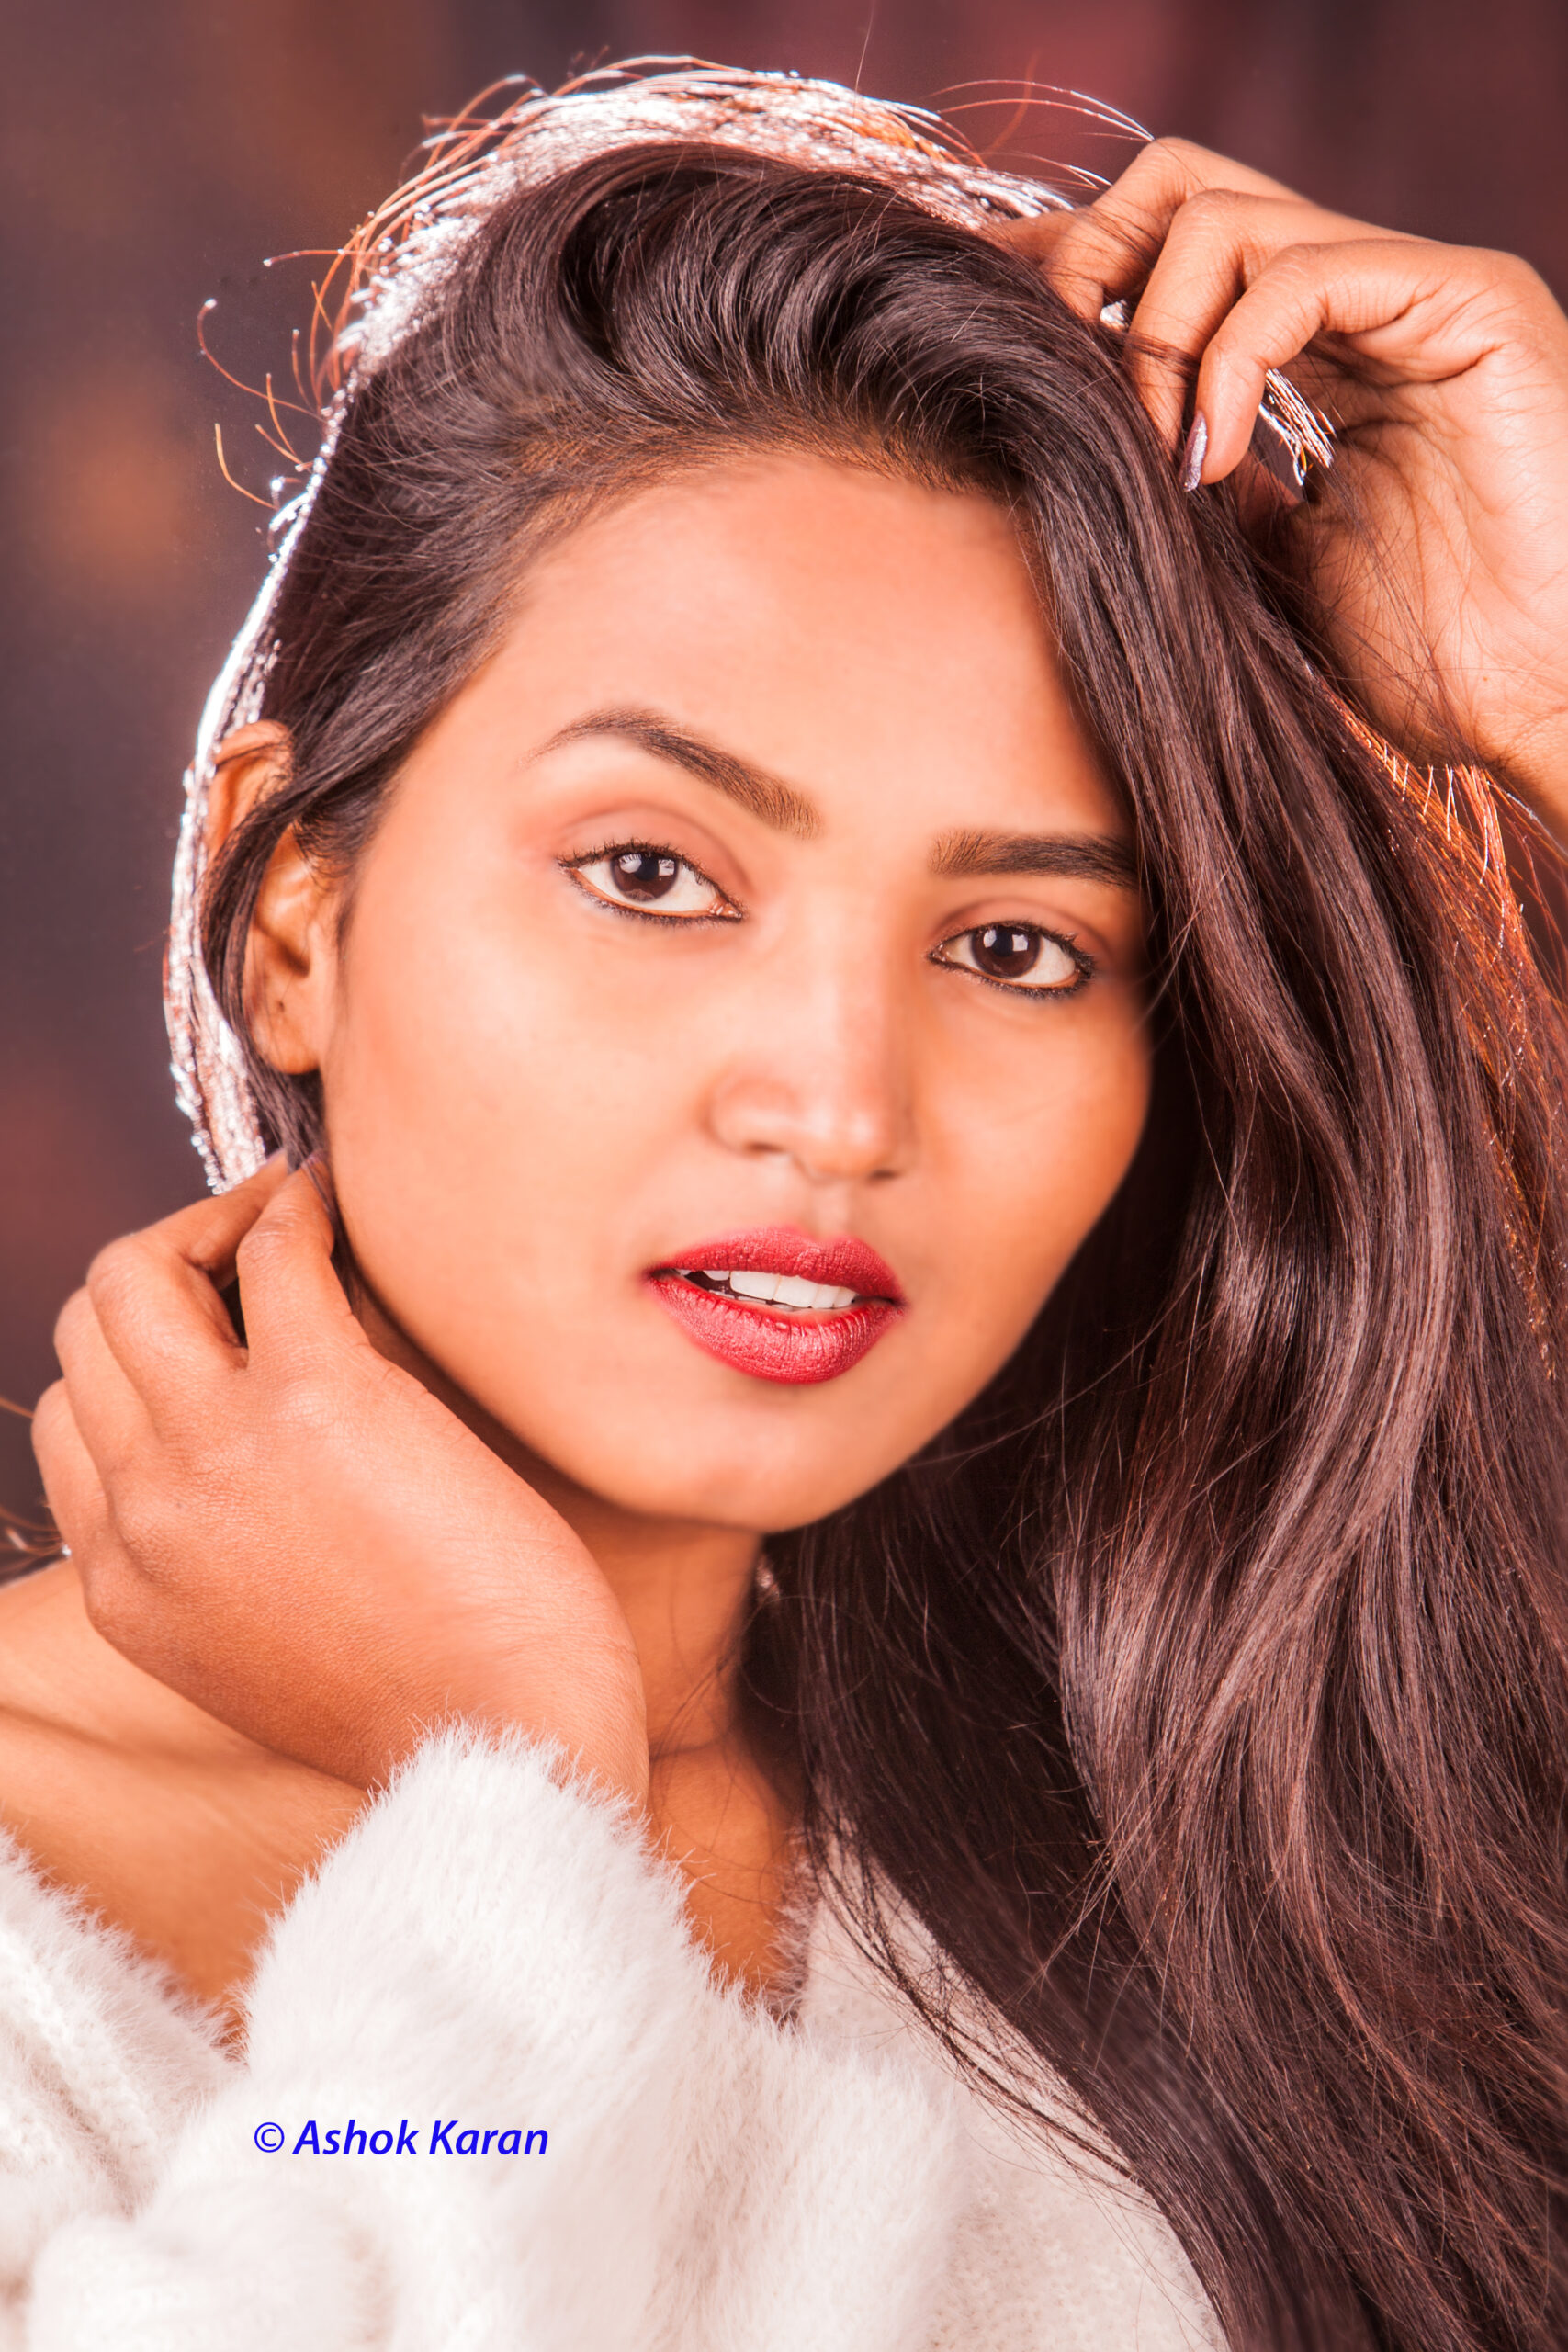
One particular session stands out in my memory—a young aspiring model approached me for a portrait and full-body photoshoot. She was a bit nervous, so I took time to have a genuine conversation with her first. Establishing trust and comfort is key in bringing out natural expressions in front of bright studio lights.
For this shoot, I used the classic three-light setup. I positioned the model at a slight angle to the camera, asking her to look directly into the lens while tilting her head gently to the left. Her left hand rested above her head while the right hand lightly touched her neck—a pose that added elegance and poise.
Lighting Setup:
- Backlight: Positioned to create a beautiful hair glow against a dark background
- Main Light & Fill Light: Positioned from the front to softly and evenly light her face
Camera Gear & Settings:
- Camera: Canon EOS 1D Mark III
- Lens: 70–200mm f/2.8
- Exposure: f/6.3, 1/250 sec, ISO 100
- Handheld Shot
The final image captured a soft yet striking presence—brightly lit, with depth and dimension.
Portrait Tips from My Experience:
- Pose the subject at a slight angle to enhance body curves and avoid a flat appearance.
- Encourage natural gestures—crossed legs, a hand on the hip, or interacting with surroundings.
- Avoid limp hand placements; aim for dynamic composition.
- Shooting at eye level builds a stronger connection with the viewer.
- Experiment with varied compositions, from tight close-ups to wide environmental portraits.
- Let the subject move naturally or look away from the camera to capture candid expressions.
Studio portraiture offers endless creative possibilities. With the right lighting, thoughtful posing, and an open connection with the subject, you can create portraits that resonate not just with the person being photographed, but with every viewer.
📷 Portrait of a young aspiring model, shot in-studio.
If you enjoyed this insight into studio portrait photography, please like, share, and subscribe for more stories and behind-the-scenes moments.
#Hashtags
#PortraitPhotography #StudioPhotography #BehindTheLens #PhotographyTips #PhotojournalistTurnedStudio #LightingSetup #CanonPhotography #ModelPhotoshoot #CreativePortraits #PhotographyJourney #AshokKaran
Leave a Reply